¶ Introduction
This guide is a work-in-progress.
BF3: Reality Mod is a Battlefield 3 modification with a focus on teamplay, communication, and combined arms. Drawing most of its inspiration from the BF2: Project Reality mod, it offers a complete gameplay and UI overhaul that creates a more tactical and in-depth experience compared to vanilla BF3. The focus moves away from racking up kills as an individual, and towards working as part of a squad, creating an environment where the player must rely on other team members. It increases the value of a single life, making you feel that - in executing a smaller piece of a bigger plan - you are contributing to your team's victory.
What allows us to do this? Battlefield 3 doesn’t have any official mod support? EA said it was impossible? Enter Venice Unleashed. VU is the platform that brings mods to Battlefield 3 in full compliance with EU interoperability laws. No game files are directly modified, and having VU installed to play Reality Mod does not mean that you can’t play vanilla BF3. If you want to wind down after an intense round of RM, as long as VU isn’t open, you can play BF3 as if it was never there. There are no complex mod installation processes with VU – all required mods are downloaded as you join a server.
This guide, alongside the rest of this wiki, serves as a detailed introduction for new players, as well as an easy reference tool for players to get reliable information on some of the mechanics of Reality Mod. It will explain everything from how to join a game to the intricacies of ticket bleed and points scoring. Just like the project itself, this guide is made by the community, for the community, and is constantly evolving alongside Reality Mod. If you have something to add to it, please do! To help you navigate, a table of contents is always available - no matter how far you've scrolled down to the left.
Whether you’re itching to contribute to Reality Mod, want to take part in the discussion, or just curious, join the official forums or Discord server. You can also join the official VU forums and Discord server to see what other modders are up to. There is also a subreddit.
Official RM Discord Server
Official RM Forums
Official RM Twitter
Official RM Patreon
Official VU Discord Server
Official VU Forums
Reality Mod Subreddit
¶ Getting Started
¶ System Requirements
To play Reality Mod, you have to run it. The good news is, that’s surprisingly easy when the base game is designed for 2011-era hardware. That said, in pushing the boundaries of what’s possible with Battlefield 3, the recommended system requirements for Reality Mod are slightly higher:
These are currently being evaluated.
- OS: Windows 7 (64-bit), or newer
- Processor: Quad-core CPU at 3.0GHz, or greater
- Memory: 8 GB RAM, or greater
- Graphics: Base frequency of 1120MHz and 4GB video memory, or greater
- DirectX: DirectX 11 compatible
- Storage: Greater than 20GB of free space
- Internet: A constant internet connection is required for Venice Unleashed
A legitimate installation of Battlefield 3 with all DLC is also required. Both Origin and Steam editions are supported. It must have been launched (in vanilla) at least once.
¶ Downloading Battlefield 3 (with Premium)
The first step is to download BF3, and this is done just as normal. Battlefield 3 Premium Edition can be purchased frequently on sale for 15€/$15/£10, from either Steam or Origin. The important thing to note is that all DLC are required, since Reality Mod brings in assets from a wide range of levels for its maps. The easiest way to make sure your copy of BF3 is good-to-go for Reality Mod is to have Premium. If you purchase Battlefield 3 Premium Edition, Premium will be included. If you already own the barebones or Limited Edition copies of Battlefield 3, you can buy Premium separately. If you don't have Premium but already own a couple of the DLC, you can buy the rest individually as well. The complete list, all of which you need, is as follows:
- Battlefield 3 Close Quarters
- Battlefield 3 Back to Karkand
- Battlefield 3 Armored Kill
- Battlefield 3 Aftermath
- Battlefield 3 Endgame
If you're not sure, it's easy to check. In Origin, you can check the Extra Content menu after you click on the Battlefield 3 tile. Make sure 'Installed' appears under all the required DLC.
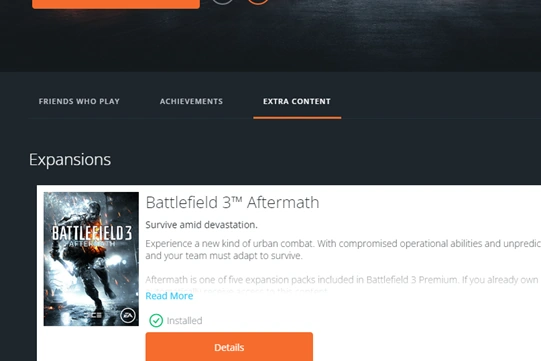
Origin showing that the Aftermath DLC is owned and installed.
In Steam, right-click Battlefield 3 and open Properties. Go to the DLC tab and check that all the required DLC are in that list and ticked.
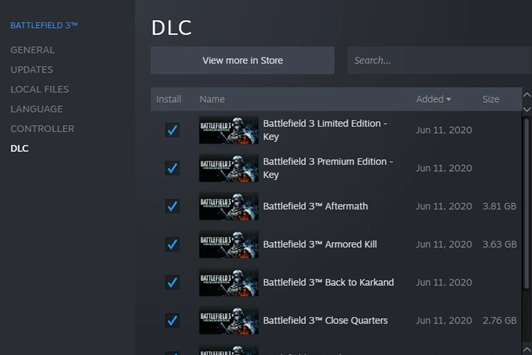
Steam showing that a number of DLC are owned and installed.
Once you're sure BF3 and all its DLC are installed on your PC, you need to launch it once for VU to recognise it. Hit 'Play', and after a couple seconds and the first-time setup process, Battlelog should open in your browser. If you're using Steam, the first-time setup will install Origin, prompting you to create/login to your EA account. If Battlelog doesn't open, you can navigate there by yourself. Once in Battlelog, go to the server browser and join any server. Wait for the game to load, and once you're in and looking at the spawn screen, you can close the game. It's time to set up Venice Unleashed.
It's worth noting again that a legitimate copy of Battlefield 3 and its DLC is absolutely required. Venice Unleashed does not and never will work with pirated and/or cracked software.
¶ Downloading Venice Unleashed
VU is easy to set up. From playvu.com, click Download VU. Once the VU installer has downloaded, open it and follow the steps. When complete, open the VU Client (you can do this from the Start Menu). We need to authenticate our copy of BF3 with Origin, create a VU account, and login. Again, this is straightforward, but if you come across any issues, the VU Discord is the best place to ask. One common problem is that the path to the Battlefield 3 game files cannot have signs 'not native to English', otherwise VU won't be able to locate it.
Once you're logged in and able to look at the server browser page, that's it: you're ready to join a Reality Mod server and start playing. If you're a first time player, however, you might want to read on and get yourself familiar with the basics before you jump straight into a game.
¶ Setting Launch Commands (optional)
Only do this if you've been specifically told to: it might make you encounter errors in public RM servers.
Most players don't need to care about these, but launch commands are a very handy tool to tell the VU Client what parameters you want to launch with. For example, if you're helping to test updates to Reality Mod as part of the Early Access team, or you're having problems, you might need to run the development branch of Venice Unleashed and enable error tracing tools. The most common way of doing this is by adding your launch commands straight to the VU Client shortcut, whether you're launching it from your desktop or the Start Menu. Right-click the VU Client shortcut and open Properties. At the end of the Target field, add all the launch commands you want.
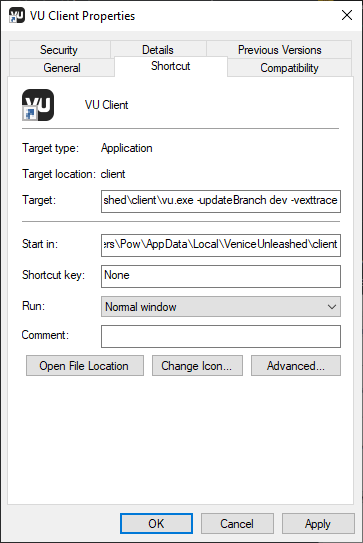
The most common one for the VU Client is -updateBranch dev, which tells VU to update to the development branch, often used with -vexttrace, which allows you to copy an error tracing log if VU crashes. The VU Server has a few different ones.
This is not the only way to set launch commands. Some people like to add Venice Unleashed to Steam as a non-Steam game and manage launch commands through there, and some people like to create batch files. If you're working with launch commands frequently, find what works best for you.
¶ The VU Interface
The VU interface is simple and intuitive. If you've already authenticated your copy of BF3, when you launch the VU client you'll see a login page followed by a soldier selection page - you can create up to four soldiers, each with their own name, but their function does not extend much beyond that. There are four main menus: news, server browser, credits, and settings.
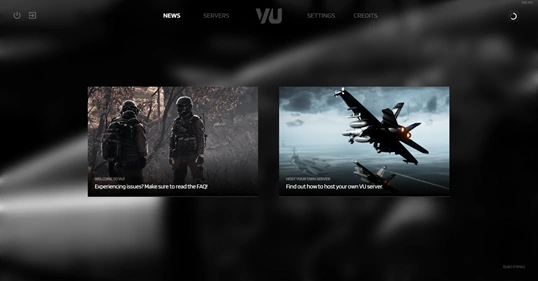
The news menu.
The news menu gives you a couple links, which either show you some news about what's going on in the community or some helpful information. This is the first thing you see when you log in.
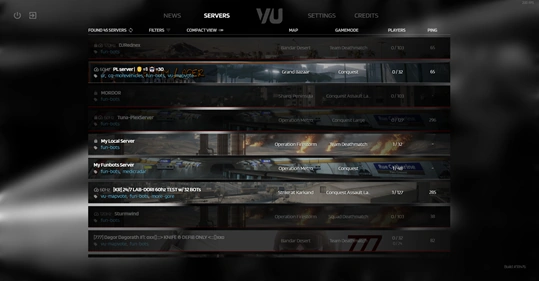
The server browser menu.
The server browser allows you to browse a list of all the currently active VU servers running all sorts of different mods, including Reality Mod servers. Servers will tell you what they're about in their names, and the mods they've got loaded might be shown as a blue tag underneath the server name. You can use the filter and search tools to help find a server, and when you find a server you want to join, you don't need to worry about whether you have the required mods downloaded: VU will manage that all for you when you click 'Join'.
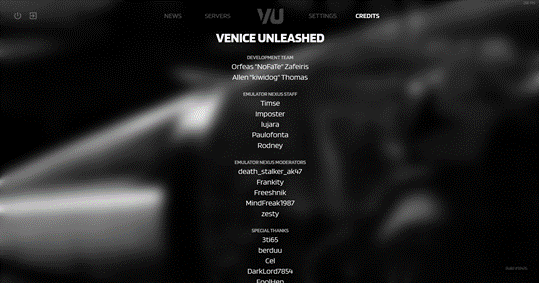
The credits menu.
The credits menu is a scrolling list of all the hard-working contributors to thank for creating the incredible Venice Unleashed platform over the last long few years.
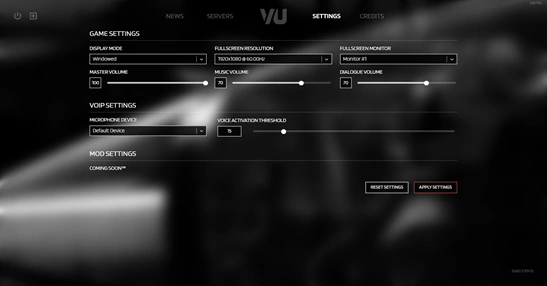
The settings menu - before the implementation of the mod settings UI.
The settings menu allows you to change basic game settings and Venice Unleashed options. These include VOIP settings and mod-specific settings. Make sure your default microphone is selected.
Venice Unleashed downloads updates automatically after you launch it. They are installed when you next restart the client, and you can see their progress in the top right of the main menus.
¶ Default Keybinds
Controls for movement, aiming, entering vehicles, etcetera are all handled in the vanilla BF3 settings, which you can change whilst in-game. Special keybinds, specific to Reality Mod, are handled in Mod Settings. The defaults for these are as follows:
| Key | Feature |
| CAPS LOCK | Open squad menu and map |
| ENTER | Open kit menu and map |
| L.ALT | Enable free-look |
| E | Enter vehicle |
| T | Open tac-rose |
| I | Swap compass position (top or bottom) |
| B | Squad VOIP |
| G | Local VOIP |
| Y | Command VOIP (all squad leaders) |
| NUM 0 | Command VOIP (all squad leaders) |
| NUM 1-9 | SL direct VOIP (squad leader to squad leader) |
¶ Custom Keybinds
This is a temporary solution, and is subject to change.
As of Reality Mod v0.1, RM-specific keybinds (such as for VOIP, tac-rose, and compass) must be changed in your settings.json file. This is located in the Venice Unleashed directory, by default at C:\Users\$$$$$\AppData\Local\VeniceUnleashed\mods. Once you have this file open, it is recommended that you 'beautify' it using a JSON beautifier, such as this one, to make it more readable - just copy the text from settings.json, paste it into the beautifier, press 'Beautify', and paste the nicely formatted result back into settings.json (replacing the old one). Find the keybind you want to change, which is named intuitively, such as "Tac_Rose_Key", and reference the 'value' field. BF3 reads keys as numeric values, which you can translate using this list from the VU documentation. Find the key you want to use, translate it into numerical form, and replace the 'value'.
That's not the most intuitive process in the world, so here's a quick example. Say I want to change the tac-rose menu key from T (the default) to Y. I beautify my settings.json and find the "Tac_Rose_Key" entry. I see the 'value' is set to 20, which corresponds to IDK_T according to the VU docs. I want the key to be IDK_Y, which corresponds to 21. Therefore, I replaced the number 20 with 21. That's it.
The entry would go from looking like this:
"Tac_Rose_Key": {
    "type": 2,
    "displayName": "Tac-Rose Key",
    "showInUi": true,
    "value": 20
},
to this:
"Tac_Rose_Key": {
    "type": 2,
    "displayName": "Tac-Rose Key",
    "showInUi": true,
    "value": 21
},
It is worth noting that you cannot currently bind mouse buttons.
If you have any trouble with keys not working, try deleting settings.json and rejoining the server. This will automatically reinstall the file, and return you to default keybinds. Sometimes you may see a settings.json.bak file - you can delete that too.
¶ Joining a Game
Now you have an idea of the basics, you're probably keen to get into a game. If you have Battlefield 3 and Venice Unleashed installed, you don't need to install any extra mod files. Open the VU Client, login, choose/create a soldier, and go into the server browser. The easiest way to find a Reality Mod server is to use the filters option at the top of the server list. Filter by tag, scroll down, and find realitymod.
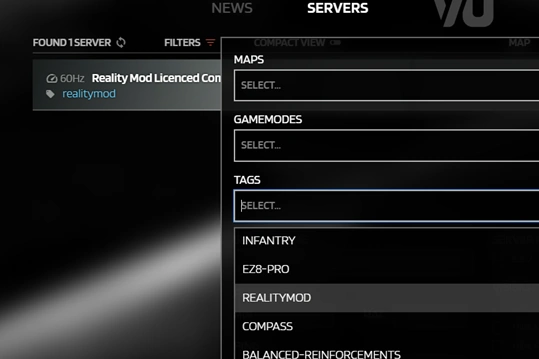
Filter set to only show Reality Mod servers.
The server browser list will now only show servers running Reality Mod. Find one you like the sound of, and join it. Pay attention to the ping (make sure it's as low as possible), and the player count (make sure it's as high as possible, but still has some space so you can join). When you join the server, VU will download the mod files and UI for you if you're joining for the first time. When you start loading the level, you will see the Reality Mod loading screen UI. Loading should take no more than three minutes. If you're not seeing the RM UI or loading is taking ages, ask for help in the Reality Mod Discord or Forums.
¶ Choosing a Squad
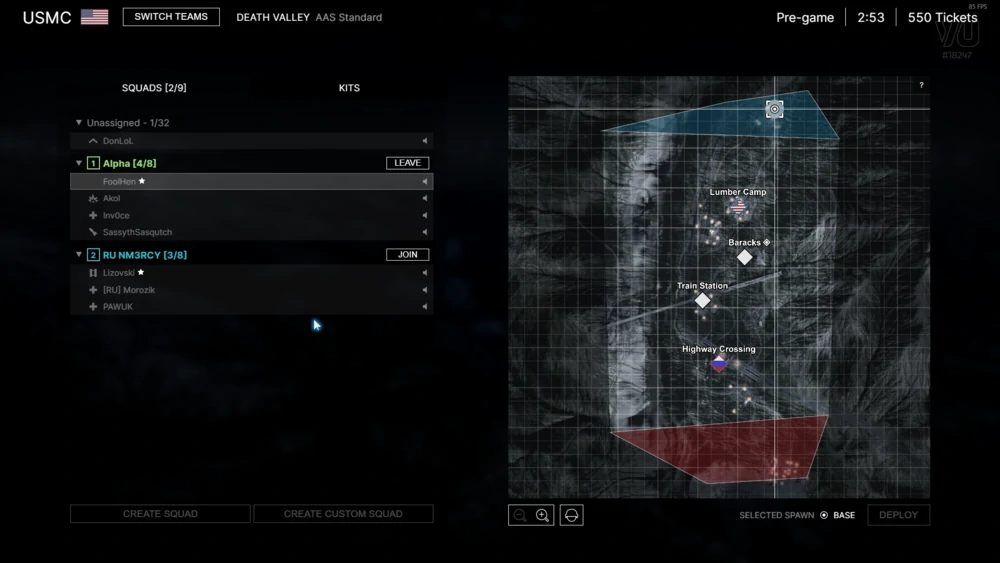
The squad menu at the start of a round.
This is harder than it sounds. Firstly, you want to join a squad with the right role: if there's a squad called 'Heli Trans' (helicopter transport), don't join it, unless you want to and are able to fly a helicopter (if you've never flown in RM before, you are not able to). Squads with 'inf' in the name are a good starting point, but if a squad does not specify its role in its name, it's probably an infantry squad. Secondly, you want to join a squad such that there's an even distribution of players across the team: a team with one infantry squad of eight and one infantry squad of 1 is no good - ideally, a few people should leave the full squad to go fill up the second.

Here, SassythSasqutch should join Squad 2 ('FOX SQUAD') to evenly distribute players across the team. It might also be a good idea for them to type in the chat and ask a few people from Squads 1 and 3 to join Squad 2 as well.
When the round first starts, you might have to wait a couple of minutes before someone creates a squad. As soon as you join a new squad, you should check in with your SL. If you're new to the game, it's a good idea to let them know; if not, it's good practice to ask the squad leader what kit they'd like you to take.
¶ Choosing a Kit
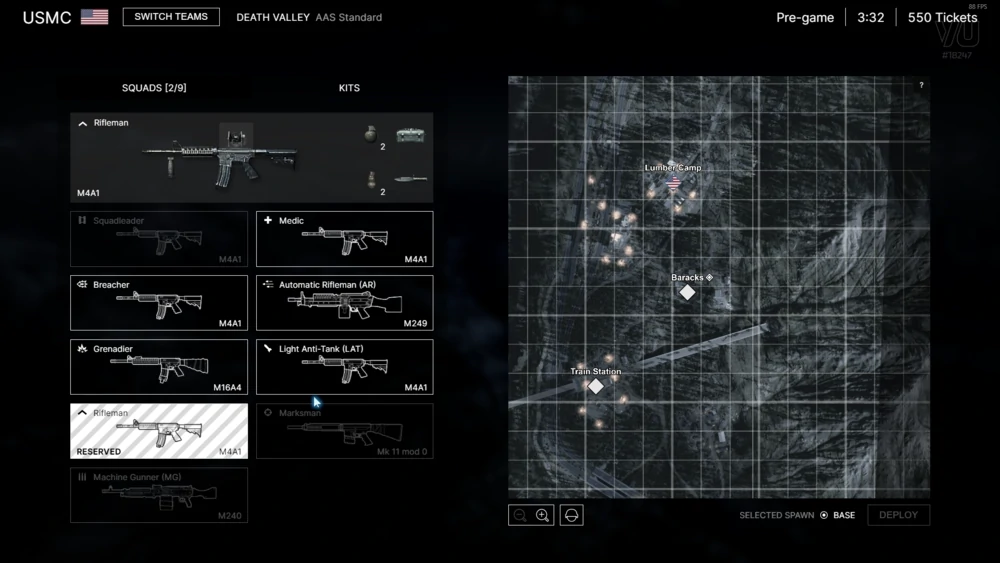
The kit selection menu at the start of a round. There are fewer than six members of my squad at the moment, so not all the kits are available.
If you're a new player, this is an easy choice: Rifleman. The Rifleman is the bread-and-butter of any effective infantry squad, especially since they are the only kit with access to an ammo bag to resupply teammates. It's an easy kit to use well, which means, as a new player, you aren't distracted by secondary roles as you're learning the basics of the game. If you have some experience, you might have your favorite kit, but your squad leader would appreciate you asking what they need: the squad might not have a Light Anti-Tank kit or Automatic Rifleman, for example, and the SL might have a plan in mind that will require one.
You have to be in a squad to choose any kit other than Rifleman, and the size of the squad limits what kits you have access to. There are also limits to how many soldiers of a certain kit a squad and a team can have. A summary is below.
| Kit | Required No. of Squad Members | How Many Can A Squad Have? | How Many Can A Team Have? |
| Rifleman | 0 | ∞ | ∞ |
| Squad Leader1 | 1 | 1 | ∞ |
| Medic | 2 | 1 | ∞ |
| Automatic Rifleman | 4 | 1 | ∞ |
| Breacher | 4 | 1 | ∞ |
| Light Anti-Tank | 4 | 1 | 4 |
| Grenadier | 4 | 1 | 4 |
| Machine Gunner | 4 | 1 | 4 |
| Marksman | 4 | 1 | 4 |
| Combat Engineer | 2 | 1 | 2 |
| Rifleman AP | 4 | 1 | 4 |
1 The Squad Leader kit is only available to whoever holds the squad leader appointment as well.
The kit selection screen also allows you to modify the attachments on your weapon, such as sighting system and foregrip. This is done by clicking on the boxed illustration of the attachment you want to change (not all weapons have the same customisation options).
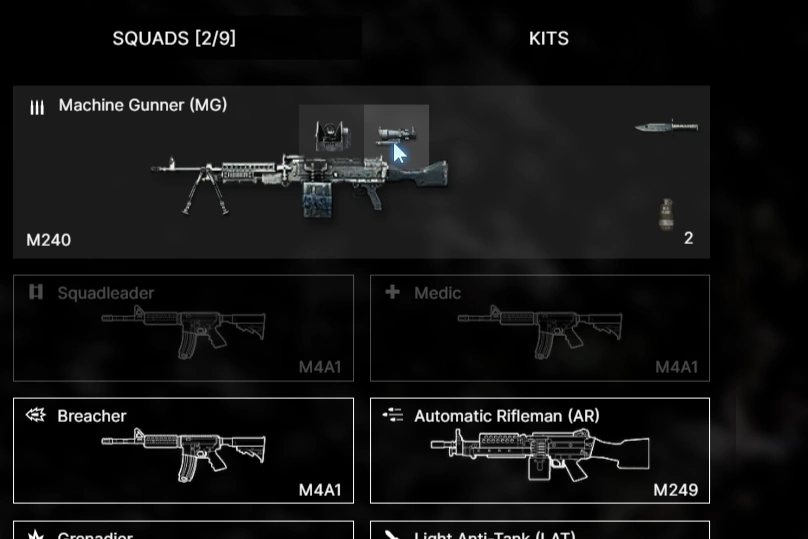
Equipping the Machine Gunner's M240B with an ACOG.
¶ Basic Gameplay
¶ The Squad
Whereas in vanilla Battlefield the gameplay emphasis is on the individual, in Reality Mod, the emphasis is heavily on the squad. How the squad operates together and to its members' strengths and weaknesses is the difference between success and failure - the individual soldier is more or less irrelevant. Each team has up to four squads, and although some will have specialized roles - such as transport or logistics - the basic infantry squad is the backbone of any winning team. Squads must work together, spreading the team's strength across the map whether to focus on one flag, distribute pressure across several flags, or carry out flanking maneuvers. This wider strategic picture is important, but the core focus of Reality Mod gameplay - and where most of the fun comes from - is within the squad.
Each squad must have a squad leader, or SL. Just like any team, effective leadership is crucial to the squad's success, and whilst the SL will work in the background with other SLs on the wider strategic picture of the round, their main job is to motivate and direct the squad, and this is crucial to victory.
However, as a regular grunt in the squad (which is where you'll start off), it is more important that you listen to and follow your squad leader. Your SL could be Nelson himself, but if you don't listen to him, it will not make a difference. Regardless of whether you've served 15 years as an Army officer and have zero confidence in your SL, it's always better for a squad to be poorly-led but working together than well-led but splintered and ignorant.
If you feel like you're constantly going into combat and getting killed before you've even fired a round, consider what your squadmates are doing. You might find you're running into the enemy way ahead of them, without consideration for the more general picture. A good tactic for new players is to just follow the squad leader like a sheep: ask them questions, listen to them, and do what they say, and you might find yourself learning a lot more.
The specific roles within the squad are covered in detail elsewhere in this wiki, but a variety of kits, with a healthy mix of Riflemen, Medics, and the more specialized kits is the final key factor in squad effectiveness. As a new player, or even an experienced one, never underestimate the Rifleman.
¶ Kit selection
In Reality Mod each kit has unique characteristics that could define the success of a squad. We will go over the kits and explain its capabilities, always ask you Squadleader if he needs a specific kit before you spawn in!
¶ Squad Leader kit
To effectively lead a Squad you will need to be equipped with a Squad Leader kit. Without this kit the Squad Leader can't set a rally-point or FOB or call-in an artillery strike, making it harder for the Squad to achieve their objectives. As a Squad Leader you will be able to mark enemy infantry and vehicles on the map (max. 3 at a time) as well as setting a distance marker for your Squad.
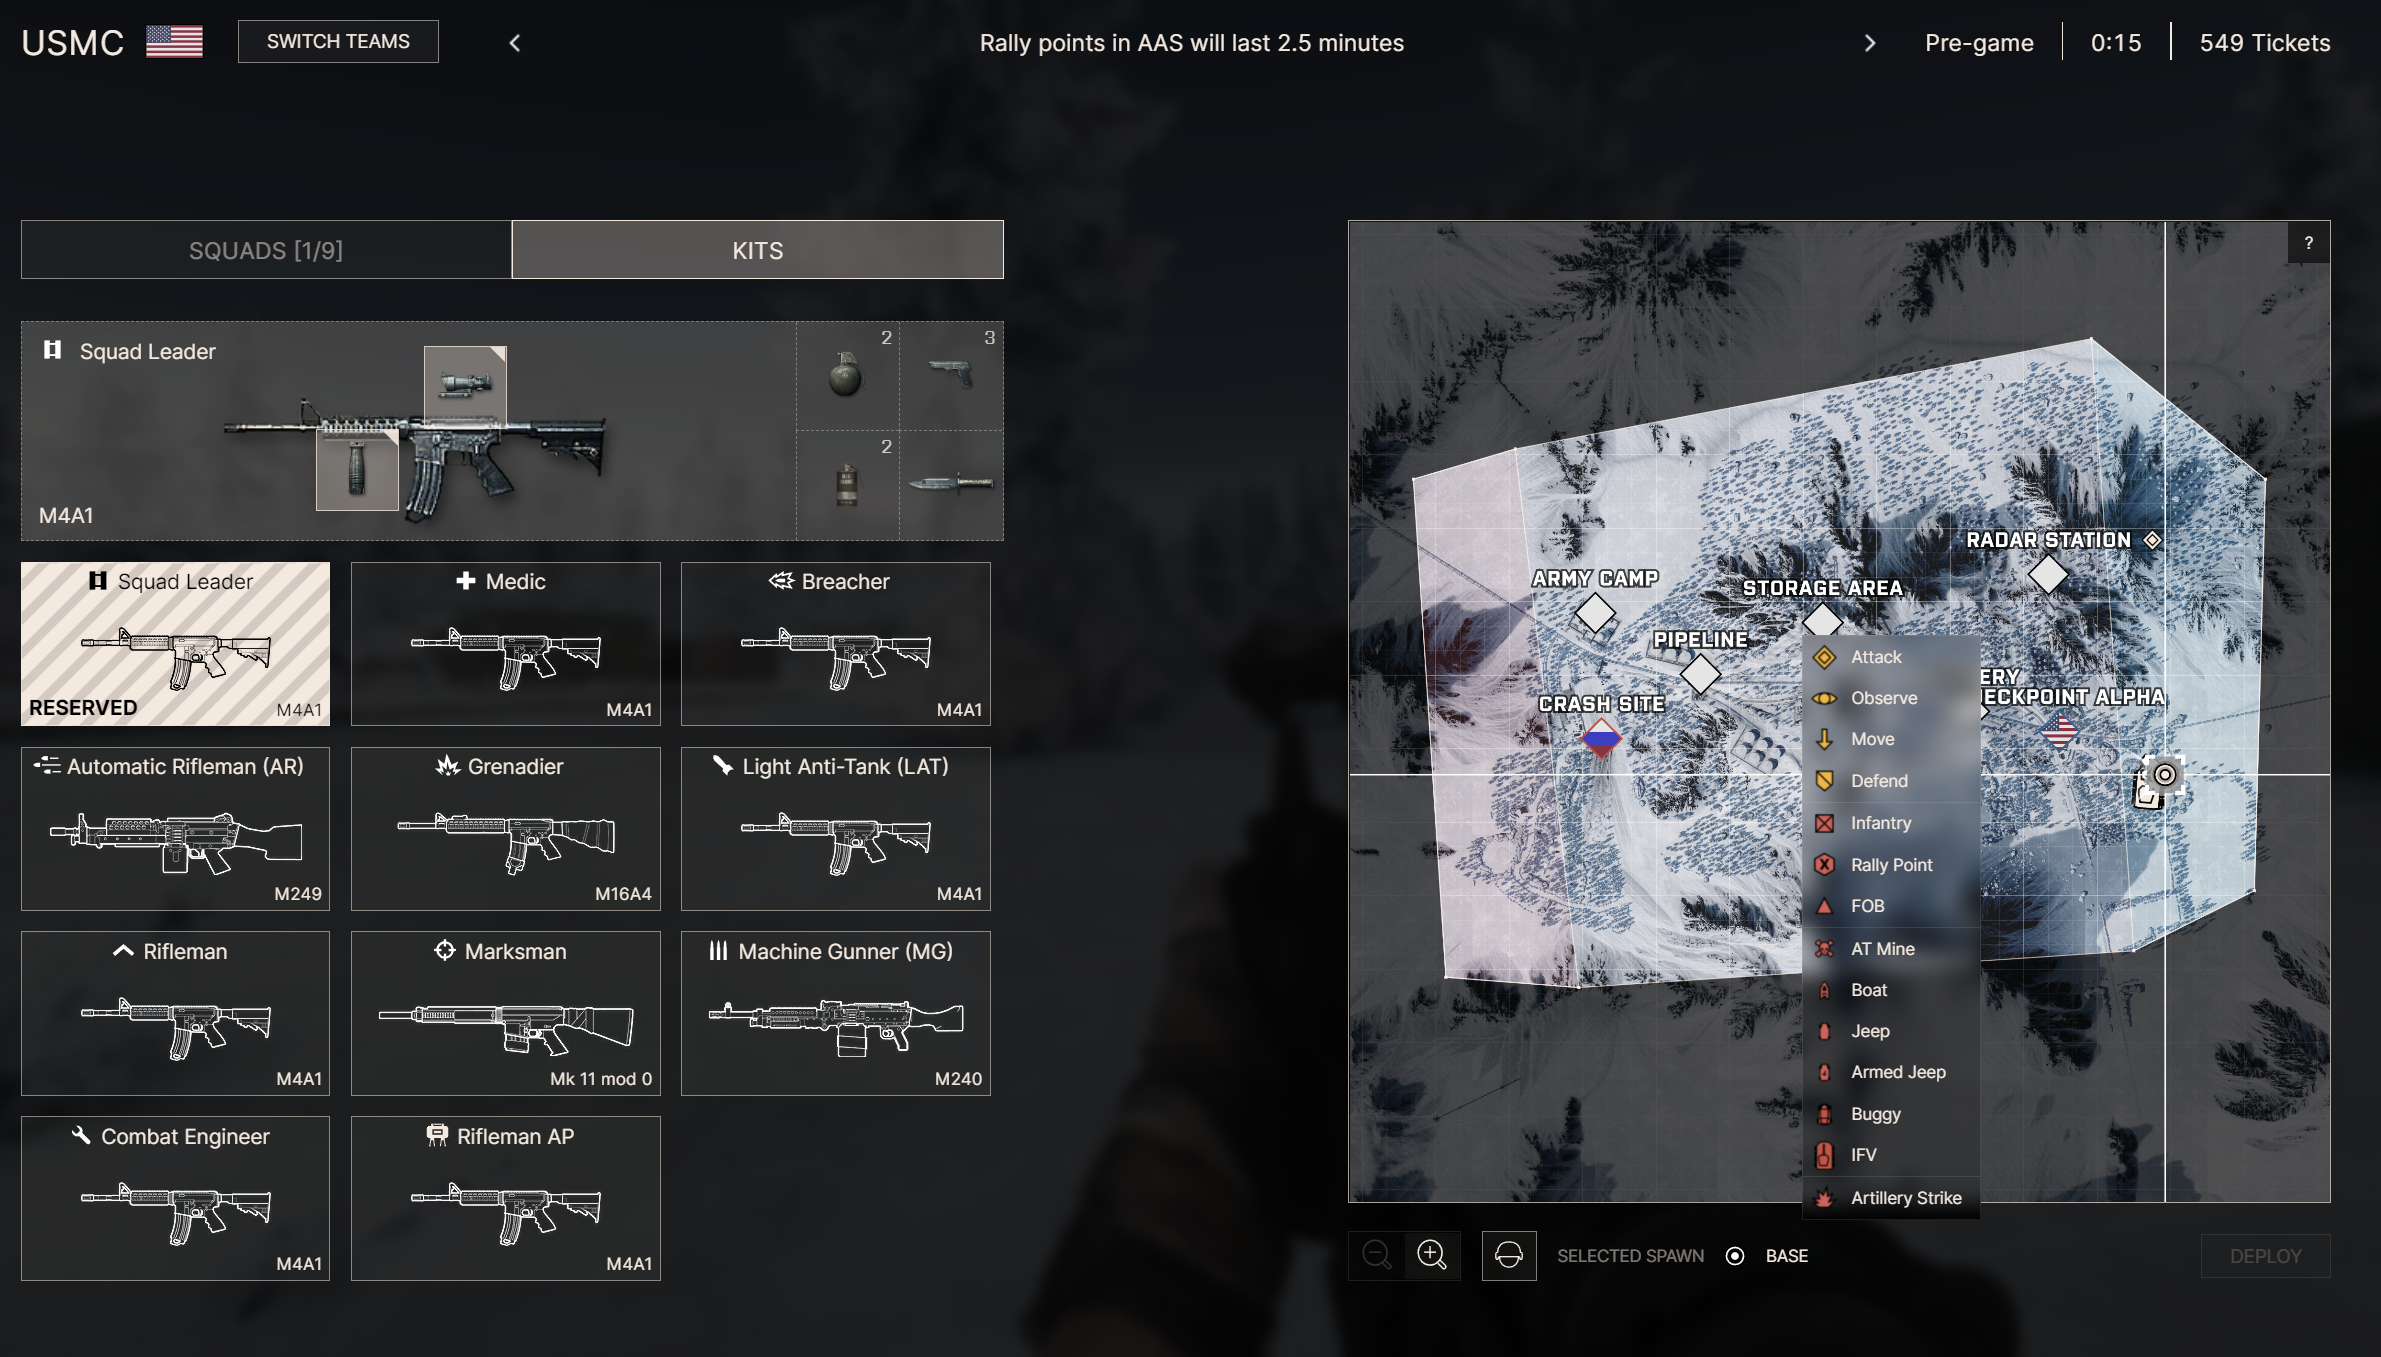
Options for the SL on the map
The kit will come with the following:
| Kit outfit | Amount |
| Main Rifle | 7 mags |
| Pistol | 3 mags |
| Grenades | 2 pcs |
| Smoke Grenades | 2 pcs |
| Knife | 1 |
¶ Medic kit
The squad's survivability not only depends on their ability to win firefights, it also depends on recovering from casualties sustained. This is where the Medic comes into play. The Medic is the only kit available that can fully heal and revive downed players. Your Squad should at least have one in order to be effective on the battlefield.
The kit will come with the following:
| Kit outfit | Amount |
| Main Rifle | 7 mags |
| Smoke Grenades | 6 pcs |
| Defibrilator | 25 charges |
| Medic Bag | ∞ |
| Knife | 1 |
¶ Rifleman kit
The "standard" infantry kit with a vital role within your Squad. The rifleman is the only kit with access to the ammo bag. With this ammo bag players can restore their ammunition and continue to fight. Do not underestimate the importance of this kit!
The kit will come with the following:
| Kit outfit | Amount |
| Main Rifle | 7 mags |
| Grenades | 2 pcs |
| Smoke Grenades | 2 pcs |
| Ammo Bag | 2 bags, 10 units each |
| Knife | 1 |
¶ Breacher kit
A great addition to the squad is the Breacher kit. Its unique capability? Blow a pathway for the squad using the C4 that comes with the kit to fully utilize BF3's destructible environments. It is also the only kit that comes with a shotgun, great for those narrow CQB engagements.
The kit will come with the following:
| Kit outfit | Amount |
| Main Rifle | 7 mags |
| Shotgun | 30 slugs |
| Grenades | 2 pcs |
| C4 | 2 pcs |
| Knife | 1 |
¶ Automatic Rifleman
Able to lay down accurate fire down range and suppress the enemy, the Automatic Rifleman comes equipped with an Light Machine Gun with an optional bipod for the extra stability. Positioning is crucial with this kit, set up a defensive position to prevent enemies from pushing up or support your Squad with your additional firepower.
The kit will come with the following:
| Kit outfit | Amount |
| Main Rifle | 3 belts |
| Smoke Grenades | 2 pcs |
| Grenade | 1 pcs |
| Knife | 1 |
¶ Machine Gunner (MG)
Bigger is better right? In addition to the AR you can choose this kit, the Machine Gunner or MG. Like the AR this kit is specialized in getting rounds downrange, quick and accurate. The difference? It comes with a bigger gun, dealing more damage per bullet even at long ranges.
The kit will come with the following:
| Kit outfit | Amount |
| Main Rifle | 3 belts |
| Smoke Grenades | 2 pcs |
| Knife | 1 |
¶ Grenadier
This role has proven its effectiveness in combat for over 700 years. Is the enemy is advancing and grouping up, lob some explosive grenades at them with the underbarrel Grenade Launcher. Having a hard time in an attack because the enemy is entrenched? Lob some grenades their way to weaken their defenses.
| Kit outfit | Amount |
| Main Rifle | 7 mags |
| Grenade Launcher | 10 HE shells |
| Smoke Grenades | 2 pcs |
| Knife | 1 |
¶ Light Anti-Tank (LAT)
The Light Anti-Tank or short LAT is the main counter- measure to deal with enemy vehicles in the field. But do not underestimate their power to engage fortified infantry, utilizing the destructibility from BF3. Everyone is eager to fire the LAT but Do Not forget to check for backblast clear! You don't want to kill the guy just behind you!
| Kit outfit | Amount |
| Main Rifle | 7 mags |
| Rocket Launcher | 2 HEAT rounds |
| Smoke Grenades | 2 pcs |
| Grenade | 1 pcs |
| Knife | 1 |
¶ Combat Engineer
The Combat Engineer not only can counter vehicles with their ability to lay mines, they can also repair vehicles in the field using their repair torch. This kit is truly the master of explosives, not only carrying mines but also equipped with C4 and grenades. Destroying vehicles is a good way to reduce the enemy tickets and you have to power to do this. Lay your mines in strategic places where enemy vehicles are likely to pass, destroy abandoned enemy vehicles using the C4.
| Kit outfit | Amount |
| Main Rifle | 7 mags |
| Anti-Vehicle Mines | 2 pcs |
| Grenades | 2 pcs |
| C4 | 2 pcs |
| Repair Torch | ∞ |
| Knife | 1 |
¶ Rifleman AP (Anti-Personnel)
There are more mines than the ones for dealing with vehicles, the Rifleman AP will have the ability to set up claymore mines. These mines will destroy any enemy unaware of its presence. Speaking of presence, this kit also comes with a motion sensor to detect enemy presence in the area. You will hear a slight change in beep when an enemy is in the vicinity. These gadgets make this kit extremely useful for setting up defensive positions
| Kit outfit | Amount |
| Main Rifle | 7 mags |
| Anti-Personnel Mines | 3 pcs |
| Grenade | 1 pcs |
| Motion Sensor | 2 |
| Knife | 1 |
¶ Marksmen
The last kit you can choose is the Marksmen. Its speciality? Providing accurate long-range fire, using their DMR with either a riflescope (8x) or a "regular" scope (4x), optional bipod and higher caliber rounds.
| Kit outfit | Amount |
| Main Rifle | 7 mags |
| Pistol | 3 mags |
| Grenade | 1 pcs |
| Smoke Grenade | 2 |
| Knife | 1 |
¶ Communication & VOIP
The voice-over-internet-protocol implementation, or VOIP, has taken some time to develop, and for good reason: voice communication is the single most important thing in this game. For everyone, there are two channels available: local chat and squad chat. When someone is speaking over VOIP, a small speaker icon appears in the bottom left of the UI. If you're speaking, it will have the active channel name written next to it; if someone else is speaking, it will have their name written next to it.
Local chat is your normal speaking voice, allowing you to speak with any friendly soldier nearby (within 50 metres). You cannot speak to enemies, nor can you speak when you're dead; however, you can speak when you're wounded to communicate with medics. When local chat is active, the VOIP icon is coloured blue.
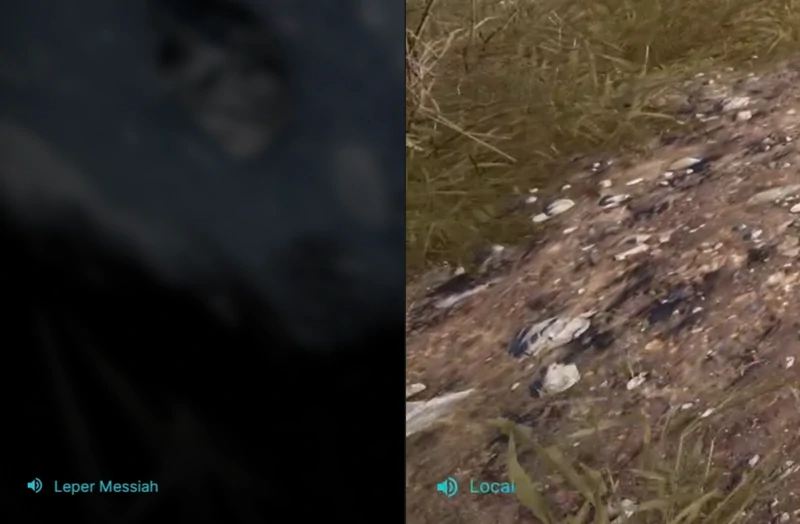
Left: I am listening to Leper Messiah on local chat. Right: I am speaking on local chat.*
Squad chat allows you to speak over radio with all members of your squad, across the map and even when dead. It's what you should be using most often, since it's how you'll be working with your squadmates and receiving orders from your squad leader. When squad chat is active, the VOIP icon is coloured green.
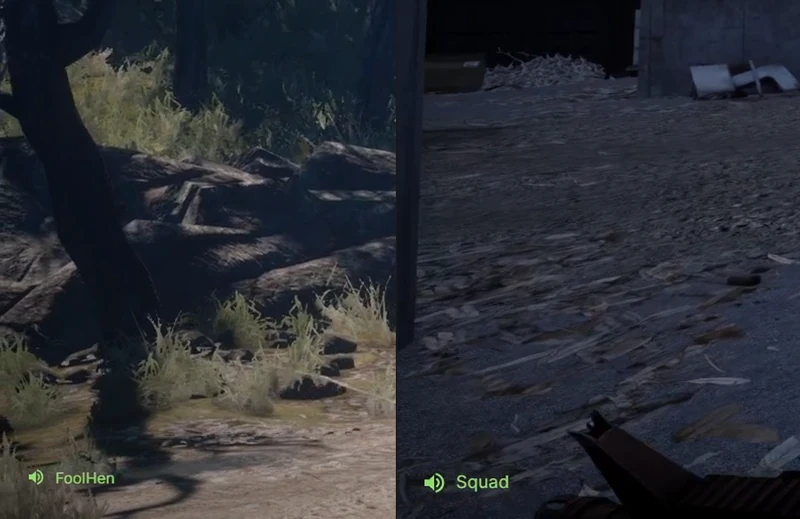
Left: I am listening to FoolHen on squad chat. Right: I am transmitting on squad chat.
Squad leaders also have the HQ channel available, which communicates with all other squad leaders, and can talk to individual squad leaders using the numpad keys. NUM 1 speaks to the SL of squad 1, NUM 2 to squad 2, etcetera. If you don't have a numpad, it's worth rebinding these keys in Mod Settings. Again, these work wherever you are on the map, and if you're dead. The HQ channel has a red VOIP icon, and the direct channel has an orange VOIP icon.
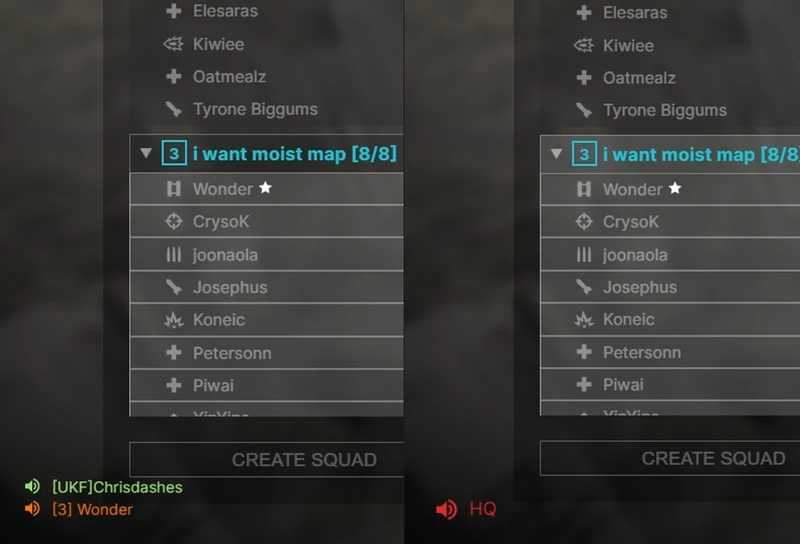
Left: I am listening to Wonder, as SL of squad 3, speaking directly to me, as SL of squad 2 (Chrisdashes is also speaking on squad). Right: I am transmitting on HQ chat.
¶ Ticket System
Tickets are at the core of Reality Mod. Reducing the enemy side of tickets is the main objective and there are multiple ways of doing that. Capturing flags deals a -30 ticket punishment to the team that lost the flag. Destroying an enemy FOB deals -25 tickets. Another option is to destroy enemy vehicles, either while the enemy is still inside them or when they have abandoned it. the enemy loses 10 tickets upon any vehicle that is destroyed. The most common way to deprive the enemy team of tickets is to shoot their soldiers. If you down a soldier it takes 1 ticket from the enemy team, if they get revived they can continue the fight. If they give up, they lose another ticket and have to respawn.
You can save your team tickets by defending your flag, defending your FOB(s), keeping your vehicles save and last but not least wait for the medic
| Action/Vehicle | Tickets |
| Take Flag | 0 |
| Lost Flag | -30 |
| Player Down | -1 |
| Player Death | -1 |
| FOB Overrun | -25 |
| Lost Transport Vehicle | -10 |
¶ Spawning
In Reality Mod, you cannot spawn on captured flags or squad members. Other than your main base spawn, you will be relying upon Forward Operating Bases (FOBs) and Rally Points, especially in the Advance and Secure gamemode. These are temporary spawn points, placed by the squad leader, for the squad and/or team to spawn on. They can be placed anywhere on the map, other than in main bases or out-of-bounds. Predictably, they are an essential part of gameplay, and their positioning and defense are another fundamental element for victory.
¶ Main Zones
At the start of a round in Reality Mod your only option for spawn are in your factions main zones. As the round is starting and people are loading in you will be in pre-time. In pre-time there is time to set up squads, make a plan but you won't be able to spawn. Once the round goes live you will be able to spawn in. Depending on the map and the gamemode there might be vehicles available
¶ Forward Operating Bases
Forward Operating Bases, usually pronounced 'FOBs' (like a key fob), are a spawn point for the entire team. These are very important and continue to be more important every update.
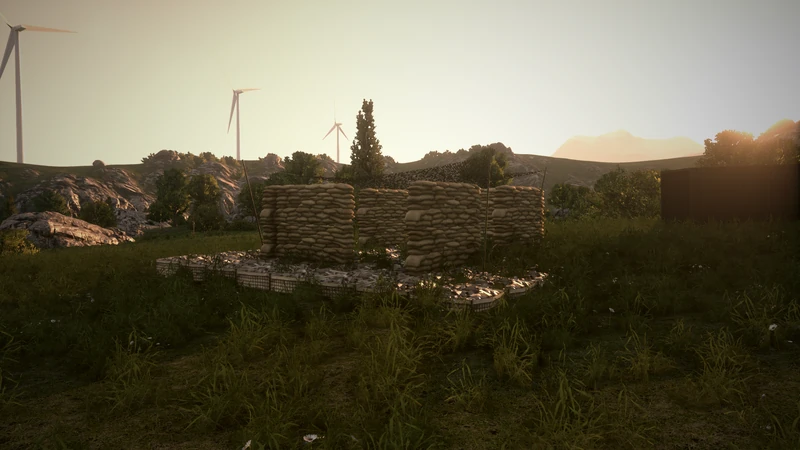
A Forward Operating Base.
They can be placed by any squad leader on their position, but there can only be three placed on the map at a time. To place them, several conditions have to be met:
- The SL must have a Squad Leader kit
- No enemies can be nearby (within 60 meters)
- The SL must be far away from another FOB (at least 150 meters)
- No FOB can have been placed within the last 5 minutes by your squad
- There are no more than 2 friendly FOBs already in place
- SL must be near x amount of squad members to place FOB (scaled)
| No. of Players in server | Squad members needed for FOB |
| < 40 | 2 |
| > 40 | 3 |
A quick word of caution: don't be too near the SL when they place a FOB! If the terrain is uneven, you can get stuck in its structure.
Once a FOB is placed by the Squad Leader it will gradually build up. Friendly presence is needed within 8 meters for it to fully build up. From the moment the FOB is placed there is 2 minutes and 50 seconds to finish the construction. Construction can be interrupted by the enemy so Do not abandon a FOB before it is fully operational
A FOB does not expire, but it can be temporarily overrun, and eventually destroyed. The enemy can overrun a FOB if they are nearby, with a greater number of enemies able to overrun from a greater distance. Details are as follows:
| No. of Enemies | Distance from FOB to Overrun |
| 1 | 10 m |
| 2 | 25 m |
| 4 | 50 m |
| 6 | 100 m |
When a FOB is overrun, no-one can spawn on it. If the enemy that is overrunning the FOB is killed or leaves, the FOB will reactivate after 30 seconds. If the FOB stays overrun for three minutes, it will be destroyed, and must be placed again. If a squad leader wishes to delete a FOB so they can place a new one, this can be done from the tac-rose (when next to the FOB) or from the map - you can remove other squads' FOBs, so be careful!
Another quick way to get rid of an enemy FOB is to place 3 C4s on or very near the radio beacon inside the FOB. If successfully detonated the FOB will instantly be destroyed.
¶ Rally Points
often referred to as just 'rallies', are exactly how their name describes. They are a short-term spawn point for only the squad, so that they can quickly rally up if they get separated.
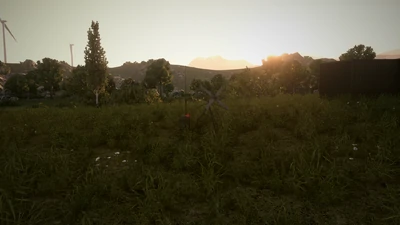
A Rally Point.
These are not going to be your main spawn point, but are a useful tool to keep the squad together. To place them, several conditions have to be met depending on the gamemode:
For AAS (Advance and Secure):
- The SL must have the Squad Leader kit
- 2 squad members must be nearby (within 20 meters)
- No enemies can be nearby (within 50 meters)
- The SL must be far away from a FOB (at least 150 meters)
- No rally point can have been placed within the last 150 seconds (2.5 minutes) by your squad
Unless within 150 meters of a friendly FOB, rally points in AAS only last 2.5 minutes, so don't rely on them for a sustained assault, such as respawning after dying when attacking a flag. For that purpose, a FOB is better. They can be overrun if any number of enemies are within 50 meters.
For SKR (Skirmish):
- The SL must have the Squad Leader kit
- No enemies can be nearby (within 50 meters)
- No rally point can have been placed within the last minutes by your squad
- X amount of squad members must be nearby (within 20 meters)
| No. of Players in server | Squad members needed for Rally |
| < 6 | 0 |
| 6 - < 10 | 1 |
| > 10 | 2 |
¶ The Basic In-Game Player Mechanics
After you spawn there are some things to consider regarding gameplay.
¶ Movement and Stamina
In Reality Mod your player can move on foot in two modes. Walking, not running, your player will walk around 6 kph. While walking you will slowly gain back your stamina. You will find the stamina indicator as a bar in the bottom right of your screen. You can also Run Default key: (Hold) L.Shift With a full stamina bar you will start sprinting at around 20 kph, as you run out of stamina the speed will gradually go down to around a 10 kph jog speed. Use this information to your advantage and always check your stamina before you make a move on the battlefield.
Not only does the stamina gradually decrease running speed, your recoil control is another thing that is bound to your stamina bar. The lower your stamina is the harder it will be to control the recoil. Each stance (Standing, crouching, prone) has an effect on your recoil too. Going prone gives you the best recoil control, while standing gives you default recoil control. Crouching will give you a slight bonus.
Another mechanic that is connected to your stamina is the weapon sway while ADS. While your stamina is draining you will gradually experience more vertical weapon sway. This to simulate the heavy breathing you will experience when running out of stamina. You can still compensate for the weapon sway by using your mouse and to fully stabilize the sway you can press and hold L.Shift to hold your breath. The time you will be able to hold your breath is 6 seconds but this goes to 0 sec together with your stamina as well.
So again while moving on the battlefield and especially in the open without cover keep track of your stamina! Move from cover to cover, take time to regain stamina to ensure your maximum effectiveness on the battlefield.
¶ Ballistics and Weapons
What would Reality Mod be without a ballistics overhaul to represent somewhat realistic bullet trajectories in-game? Right, not a Reality Mod. So this means that in-game all the bullets will experience bullet drop. Depending on the caliber and bullet speed the bullet will follow a pretty close to real trajectory all the way up to 600 meters. All optics and sights are zeroed for 100 meters. Some reticles provide you indicators on where to shoot at what distance and the Russian PSO optic includes an manual rangefinder that is 100% accurate.
| Russian PSO Rangefinger |  |
|
By looking at the image above you kinda get an idea of how this manual rangefinder is working. For those that haven't guessed it by now, the numbers 2 to 10 represent x100 meters. If your target is standing up right and his head and his feet fit between a number, then that number is the range your target is at. So for the image above we can see that the feet and the head of the target fit between the 4 mark, our target is standing up so that means he is 400 meters away. This works all the way from 200 meters to a 1000 meters |
||
| Russian PSO | 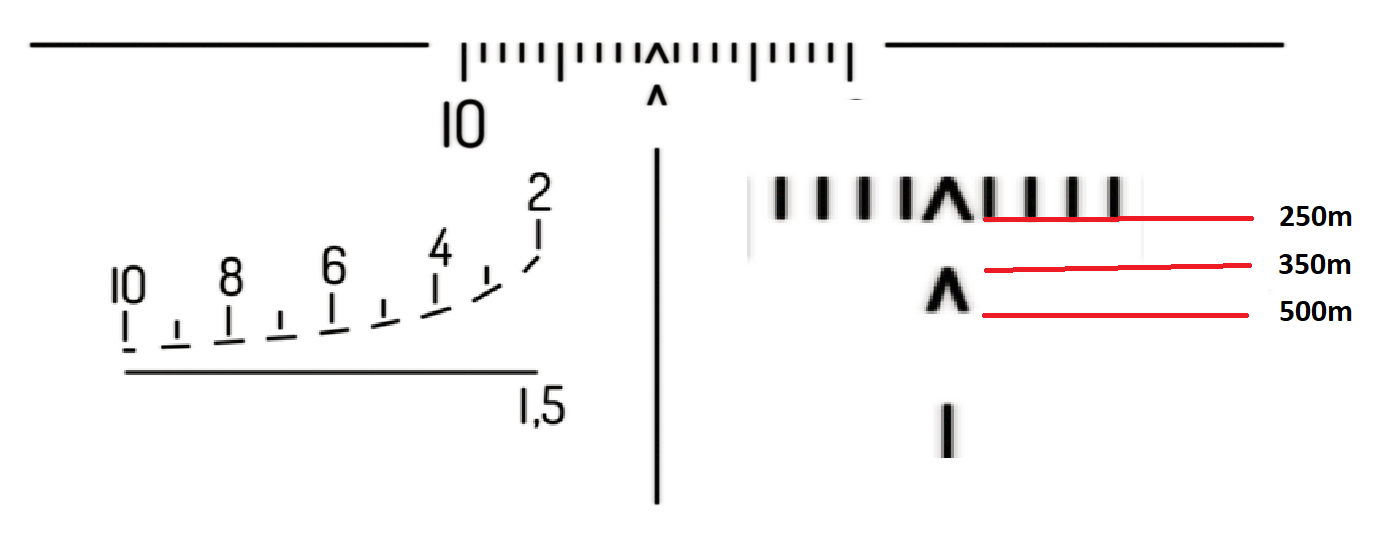 |
|
The ranging for this optic starts at 100 meters at the tip of the first chevron. The second reference mark is the bottom ""line"" of the first chevron, that indicates 250 meters. 350 meters is at the tip of the second chevron and for 500 meters you will line up with the bottom of the second chevron. |
||
| US Acog | 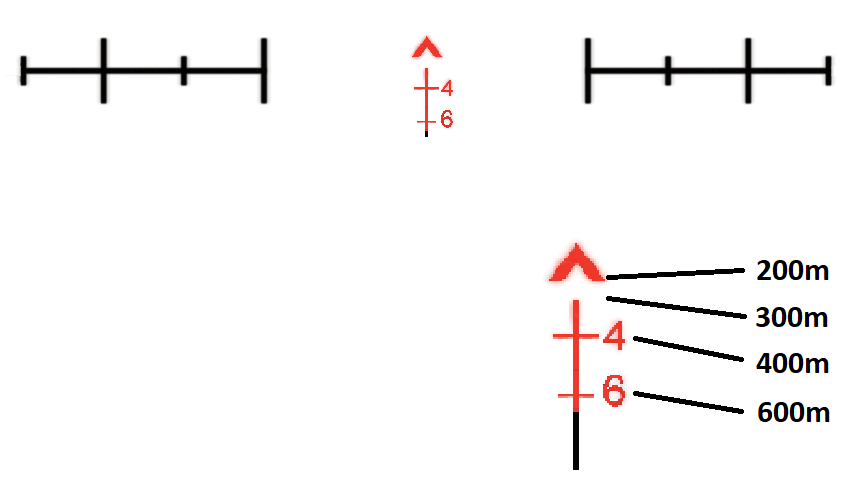 |
|
The US Acog also starts at a 100 meters at the tip of the first chevron and by now you should be able to read the image |
||
| US/RU Riflescope | 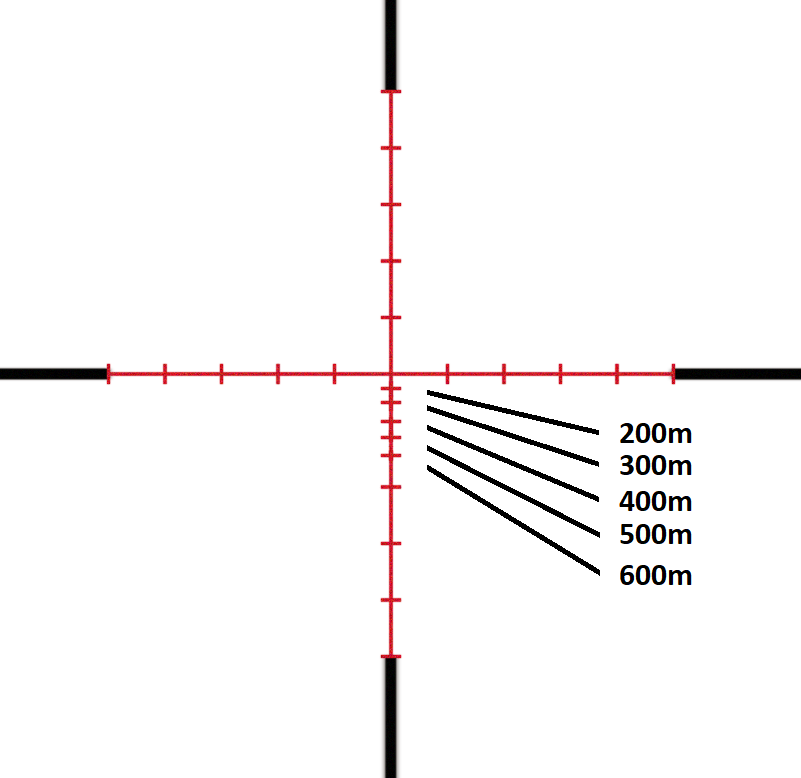 |
|
| US Elcan | 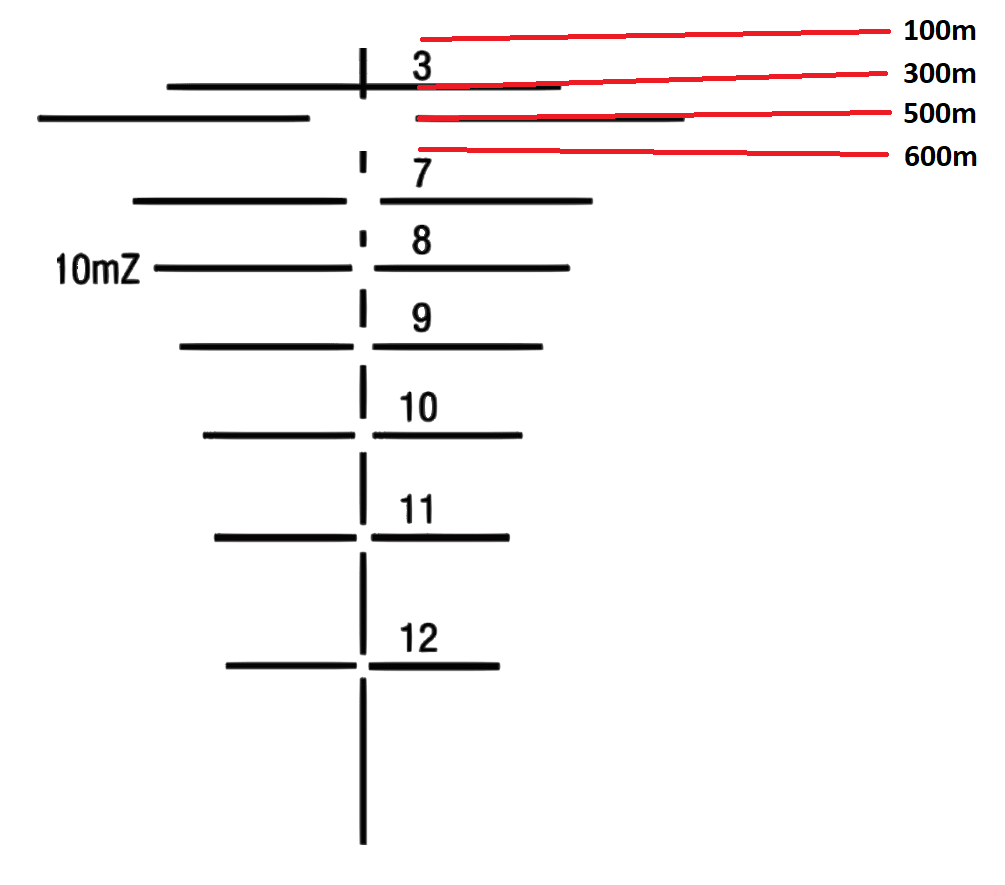 |
Another to consider is engaging with your weapon, you wont be able to ADS while moving prone. This vanilla BF3 feature is just to OP and we would like you to try and look through a sight while crawling on the ground.
¶ Suppression
There are two types of suppression in Reality Mod. Light suppression, which you will endure when someone, friendly or foe, shoots A) Close to you or B) Next to you with a small caliber weapon. Make sure you don't suppress your team-mates as it will greatly reduce their ability to see. Then there is Heavy Suppression, that is dealt by explosions and by bigger caliber weapons like the auto-cannons on the IFVs.
Suppressing someone with small arms reduces their vision to a narrow tunnel with a blur effect that gradually increases per bullet that comes in. It will also make it slightly more difficult for them to aim. To take full advantage of this setup a LMG or MMG to provide suppressive fire while the rest of the Squad and or Team moves into the enemy objective.
To be completed.
¶ The In-Game Interface
To be completed.
¶ The Medical System
To be completed.
¶ Capturing Objectives
To be completed.
¶ Scoring Points
Current Points System:
| Injuring an Enemy Per HP | 0.1 |
| Injuring a Friend Per HP | -1.0 |
| Wounding Friendly | -50 |
| Killing Friendly | -50 |
| Suicide | -50 |
| Accident | -50 |
| Wounding Enemy | 25 |
| Killing Enemy | 25 |
| Wounding Enemy in Attack Caprange | 50 |
| Wounding Enemy in Defense Caprange | 50 |
| Wounding Enemy close to Squad Leader | 25 |
| Wounding Enemy close to enemy FOB | 25 |
| Wounding Enemy close to friendly FOB | 25 |
| Healing Teammate per HP | 0.5 |
| Healing Squadmate per HP | 1 |
| Revive Teammate | 100 |
| Revive Squadmate | 150 |
| Spawn on Rally | 25 |
| Rearm friendlies as Rifleman | 0.5 |
| Placing a FOB as Squad Leader | 250 |
| Assisting FOB Placement as Squad Member | 150 |
| Squad Member close to FOB Placement | 50 |
| Placing Rallypoint as Squad Leader | 100 |
| Assisting Rallypoint Placement as Squad Member | 25 |
| Squad Member close to Rallypoint Placement | 100 |
| Overrun Enemy FOB | 50 |
| Overrun Enemy FOB as SL | 100 |
| Overrun Enemy FOB in a SQ | 75 |
| Overrun Enemy FOB Close to SL | 100 |
| Overrun FOB completed | 100 |
| Overrun FOB as SL | 200 |
| Overrun FOB in a SQ | 150 |
| Overrun FOB Close to SL | 200 |
| Capturing per Tick | 5 |
| Capturing as SL per Tick | 15 |
| Capturing in a SQ per Tick | 7.5 |
| Capturing Close to SL per Tick | 10 |
| Captured Objective | 15 |
Stick with Squad per Minute = 5, - Not Implemented
Enemy Suppressed = 5, - Not Implemented